Thursday, April 28, 2011
Almost to the Finish Line!
Apartment Therapy's Small Cool contest is approaching the end of Round 1, and I'm doing pretty decently, if I do say so myself, currently 10th out of 40 in my category. I could do a little better, though (hint, hint)! Thanks to everyone who voted for me! And definitely check out some of the other entries - there are some really good ones this year.
Friday, April 22, 2011
Stars Wars Celebrates Earth Day
Yesterday I realized that I am ridiculous. Completely and totally ridiculous. Because, for the past 27 years, I have been calling the glowy stick things they fight with in Star Wars lightsavers. Oh yeah, they can conserve energy and kill the bad guy. I never really understood the name, but I figured, what the heck, it's science fiction. No idea how I managed to last this long without figuring out I had it wrong.
Wednesday, April 20, 2011
Hurry Up Before it's Too Late!
Time is running out to enter the giveaway over on the Veater Family Adventures blog to win a $25 gift certificate to my shop, Totables! You have until Friday, so make sure you go check it out!
I just listed some new purses, and am working on several to list soon, so keep an eye out!


Bulls-eye!
So I'm not really allowed to look at rugs anymore, but in my internet perambulations, I happened to take a peek at West Elm's selection (I always like their rugs, my current one is from there via Craigslist), and came across this beauty. I don't have a room big enough for it (it's 8' square), but it's just such a fabulous rug, isn't it?

Tuesday, April 19, 2011
The Great Rug Adventure
So I've always had this thing about rugs. I don't know what it is, but I'm just really picky and can never make up my mind. In my last apartment, I looked at approximately, oh, 3000 rugs or so, and that's not really that much of an exaggeration (boyfriend can vouch for it - he was so sick of looking at rugs). So I finally got my rug, which I really liked, and it worked well in my current place as well.
The only problem with it was that I am just an inherently messy person. I've tried to change, but at least 5 days a week, I look down at myself and say things like, hmmm...why is there pizza sauce on my shoulder (two weeks ago). So the fact that the rug was mostly white proved to be difficult, even after I rented a steam cleaner. So up on Craigslist it went, and I got this one:
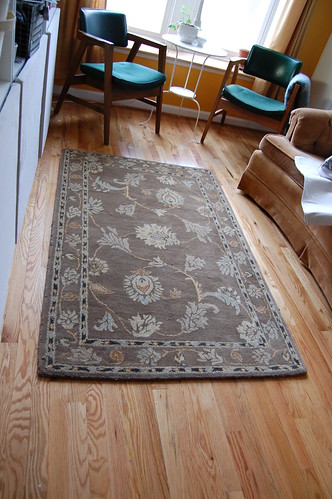
I really like the rug itself, and the brown background was definitely a plus, but the size wasn't quite right. I thought I could go down from the 5'x8' of my old rug, but this one was 3.5'x5.5', which didn't quite fit the bill. I left it for a while though, as I couldn't bring myself to get a new rug. That is, until I saw this fantastic tutorial on making a rug out of fabric, from High-Heeled Foot in the Door.

(Photo via High-Heeled Foot in the Door)
Sounds a little silly, but it fit the budget. She had used one layer of heavy-weight fabric, one layer of canvas (a drop-cloth), and a rug pad. Since I had already used canvas drop cloth for my bookshelf doors, I figured I would just do two layers of canvas. I also took some inspiration from a post on Apartment Therapy on using a doormat as a stencil to paint a rug.

(Photo via Apartment Therapy)
So I decided to combine the two ideas, and do a stamp of a gingko leaf on the canvas drop cloth. You can find better instructions on the tutorial I linked above, but here is how I did it.
Materials:
1 - 4' x 15' canvas drop cloth: $15
1 - 5' x 8' rug pad: $20
4 jars of fabric paint (red, yellow, brown, and white - only used half at most): already had on hand, I think about $4 apiece from the art store
1 - sheet of foam stuff from the kids craft aisle: $0.50
Spray adhesive: around $8
Total - around $40 or $50
How I did it:
I wanted to make sure that I made the rug the right size, so I spent some time looking at the various drop cloths, and decided the 4' x 7.5' sounded about right, so I bought the 4' x 15' one and cut it in half. Following the tutorial I laid it out, ironed the crap out of both pieces, and then folded one half back. I sprayed both sides, let it sit for a minute, and then very carefully folded it back, starting at the center line and smoothing as I went.
This is a terrible picture, but luckily I had just painted my bedroom, so I had a clear space to work in. This is with the top piece folded halfway back.
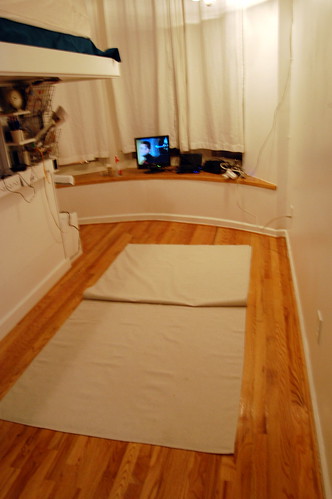
Unfortunately, after I did the first half, I ran out of spray adhesive, since I just used a can I had on hand. Since it was almost midnight, I had to wait until the morning to run to the hardware store. This time I bought the super heavy duty spray adhesive, as I had my doubts as to my general purpose stuff that I had used. Being super heavy duty though, meant that I was almost in tears by the time I got it all glued together, as it kept getting messed up, or I would step on it and mess it all up/track glue all over my floor, etc. This is not fun at all. But I do recommend the heavy duty stuff.
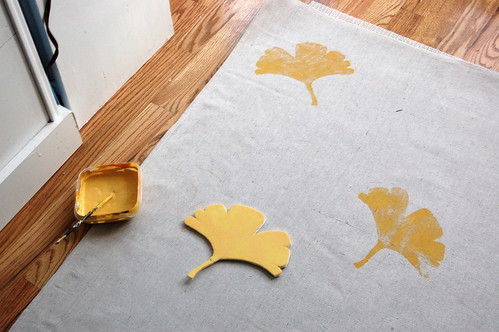
I let it dry for a while while I cut out my stamps. I decided to go with two smaller leaves, and just do a random pattern. I had also bought this foam stuff a while ago, and it worked perfectly. After looking at several inspiration leaves, I hand-drew my leaves and then cut them out.
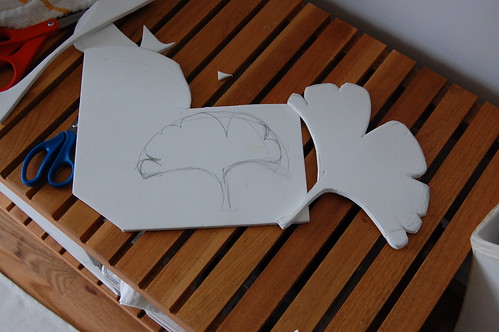
I then mixed up my fabric paints to the perfect shade of yellow, which actually turned out lighter than I wanted, and stamped away with the larger of the stamps. I painted the stamp with a brush, so I didn't make too big of a mess. I figured they wouldn't be perfect, but I really like the texture they ended up with.
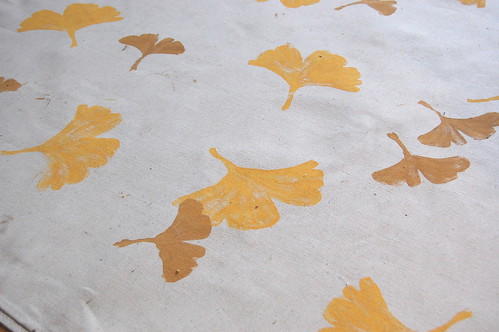
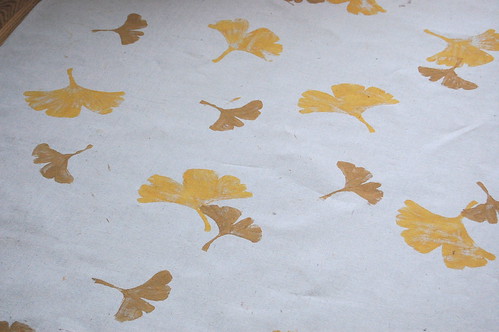
Once I had a good scattering of yellow leaves, I mixed up a brownish color (I was running out of colors to mix with), and stamped the smaller of my gingko leaves all over.
Before sewing the rug pad to it, I decided to check it out in the living room.
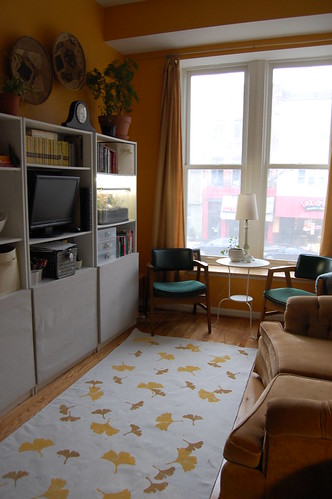
I left it like that for a while, with the rug pad under it, but not attached, and it worked quite nicely. Unfortunately, as I mentioned before, I'm a little messy, so I spilled some coffee on it. I thought I would see what would happen if I threw it in the washing machine. The side that I used the heavy-duty spray on held up pretty well, but it needed a good ironing. The other side came apart, and was a completely balled up, wrinkled mess. Needless to say, it was not something I tried to fix before submitting my apartment for Small Cool. It is currently in a balled mess underneath my bed, and someday I will put it out and try to fix it. But take my word for it, never put a rug like this in the washing machine.
Wednesday, April 13, 2011
Behind Closed Doors
So I mentioned in my house tour posts that I modified my Craigslist bookshelves by adding doors, so I figured I would give a more detailed look at what exactly I did. For a while, this is what they looked like:
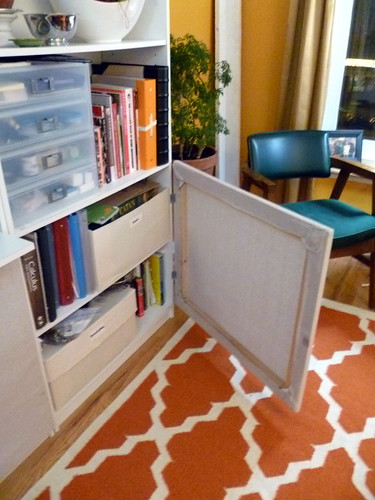

While useful, Staples paper boxes aren't exactly my idea of ideal design. I eventually migrated most of them either to the recycling or to under the loft bed, but there was still unattractive stuff on the shelves, so I came up with the idea of making doors. After my more fancy ideas got vetoed by boyfriend, I eventually came up with the idea of stretching canvas over wooden frames - simple and economical.
Supplies (for 3 doors):
3 - 1x3 boards, $3 apiece
1 - canvas drop cloth, $15 (only used half)
3 - cupboard magnetic closures, $2 apiece
3 - sets of hinges, $2 apiece
scrap hard board for frame corners, free (leftover from loft bed)
staple gun and staples, already on hand
Total cost for 3 doors - $36 (the bookshelves themselves only cost $25 for all 3)
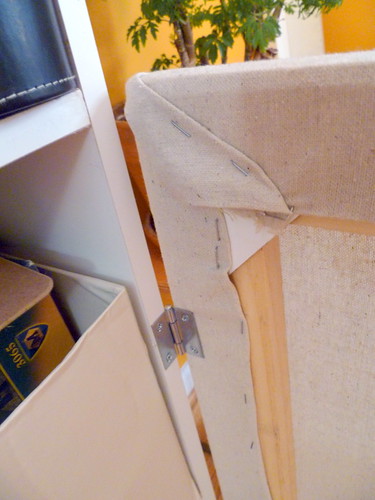
I measured and boyfriend cut my boards with the miter saw, to make perfect corners. He also cut the hard board into triangle shapes. I then glued the triangle shapes to each corner, and tacked them in place with small nails, to hold everything together while it dried.
Once my frames were all put together, I stretched my canvas over the frames and stapled it in place. I'm not exactly a perfectionist when it comes to stuff like this, so the inside isn't the most attractive, but that's not the part that shows. :)
I then attached the hinges and the magnetic closures, and put them on the bookshelves. All in all, it probably took about 2 or 3 hours to assemble them, and it instantly upgraded my shelves.
And there you have it, my custom bookshelves!
Monday, April 11, 2011
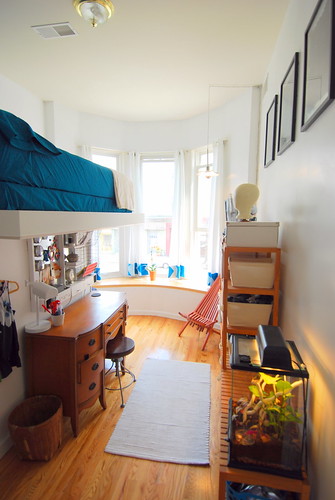
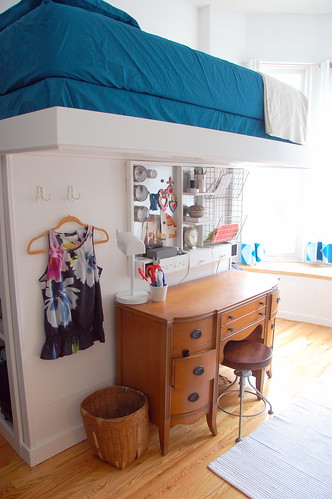
Welcome to my Home - The Bedroom
And here we come to the final space, my bedroom. Moving from a studio apartment to an even smaller one-bedroom meant rethinking how to arrange the various living areas. Before, my media area (computer monitor used as tv) was able to double up with a desk area/workspace. But having a living room less than 9' in width meant that it just wasn't possible to have a workspace in the living room, which meant it had to go in the bedroom. What also didn't help matters was that the bedroom wasn't much wider, and had windows at one end, and the door and closet at the other end, making for an awkward layout.
After much measuring and debating, I decided to go with the loft bed for multiple reasons, which I didn't realize would be such a controversial choice, but either people love it or hate it. The main reason for going with it was storage space. Despite paring down, there are just some things I'm not about to get rid of, such as my headboard and footboard, which wouldn't work at all in my new bedroom, but I've had since I was five. Since there is only one small closet as opposed to three large closets in my old place, Boyfriend and I came up with the idea of a storage locker under a lofted bed. Because it is such a small room, I didn't want it to be just a huge box in the middle of the room, but maintain as much openness as possible. This led to the cantilevered idea. The whole planning and design process can be read about here and here, but overall, I'm very pleased with the results.


The original plan had the shelves under the bed as well, but the room just seemed so unbalanced that way.
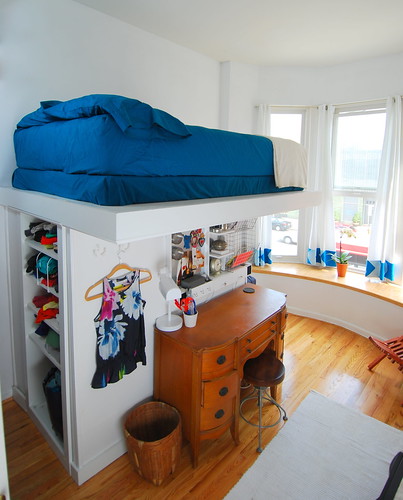
The great controversy - when (not if) when I roll off the bed and kill myself. The top of the mattress is 6.5' off the ground, which is a little intimidating at first, but I soon adjusted. I was originally going to put a railing on the bed, but seeing as it took us a few months just to build the thing to begin with, I lived with it without the railing and did fine. I have managed to stay in bed without falling for over a year now, and plan to keep it that way.
A point of reference - I am 5'3". The height of the bottom of the loft was actually a much more contentious subject in the design project between boyfriend and I. I wanted it to be 5'5" so I could walk under it. Boyfriend thought that 5' would be better, so that no one would run into the edges. I gave in, and so the bottom edge is 5' off the ground. For boyfriend, this works well, because he can clearly avoid running into it. For me, it's at eye level. Let's just say that I'm much more likely to lose an eye versus rolling out of bed. If I were to change it, I would have made it 4.5'.
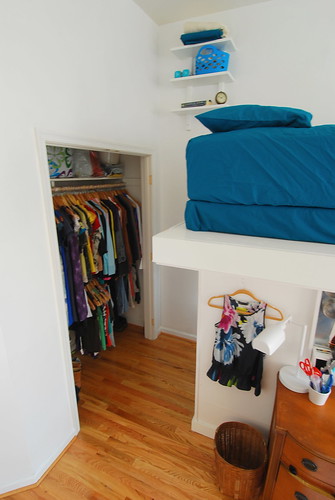
My closet had regular doors, which are nice, but didn't work well with the space once the loft was in place. I was constantly opening and closing them to get back and forth, so I eventually just took them off. In this picture you can also see my "night stand." This is half of a larger shelf that I cut and painted the same color as the wall and loft.
I was originally going to go with all white everything in the bedroom, because of the beautiful light I get, but it was a little boring. I decided to introduce some blue into the bedroom with my sheets and other touches around the room.
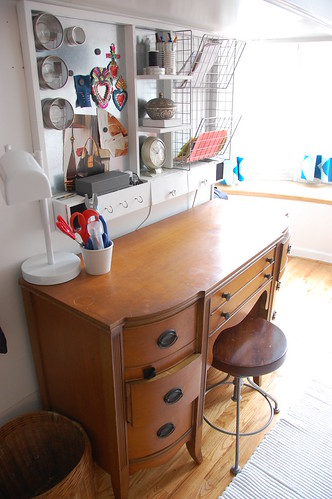
A close-up of my workspace. Because my computer ended up in the living room, I mostly use my desk for sewing. I've discovered I don't like to store supplies in drawers for some reason, so I've decided to use my desk drawers as a dresser instead, holding socks and underwear. The organization board boyfriend and I made a few years ago, and it's been useful everywhere I've lived.
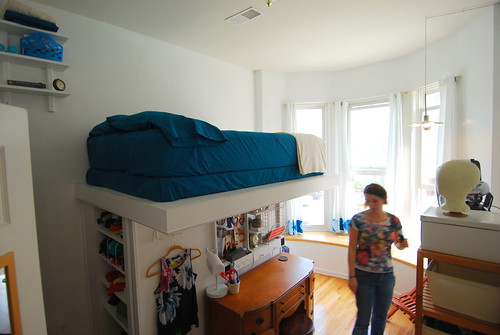
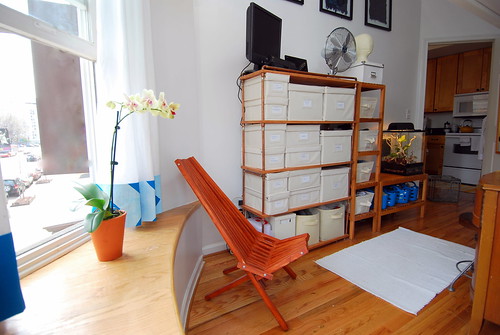
Not only has my work area had to move to another location in this apartment, but it's function has changed as well. Before it was more of a computer work area, and now it's more of a craft work area. As I mentioned above, the desk is mostly used for sewing, and the wall of shelves shown in this photo hold all of my craft supplies that I use in making my bags for Totables. The terrarium you see is there temporarily.
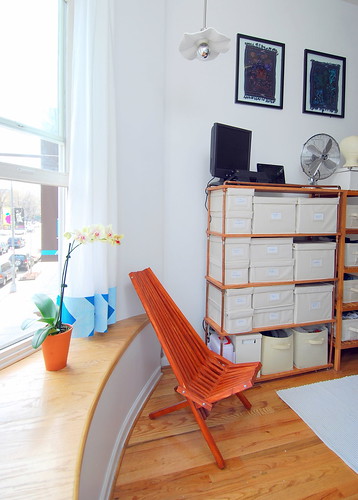
I set up my little reading nook in my bedroom using one of my chairs from Honduras (the other one is stored under the bed), and my lampshade I made for my old dining area. The curtains were also somewhat of a project. I decided to wash them a few weeks ago, and when I went to hang them back up, they were 6" shorter than they had been previously. No more using hot water and a hot dryer, apparently. So while a trip to my favorite fabric store didn't turn up a nice blue patterned material like I was hoping for, I did come home with a solid blue linen that was lovely. Boyfriend suggested making my own pattern with fabric paint, and many many hours later, this is what I had come up with. I think they turned out quite nicely and add a little interest in the room.
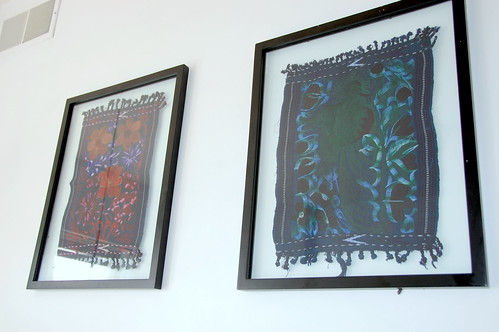
I purchased these three tapestries in Honduras, which are all various shades of dark blue, purple, and turquoise. They are pretty dark though, and it's hard to see them through the glass, as it's a bit glary. Any better suggestions for hanging them?
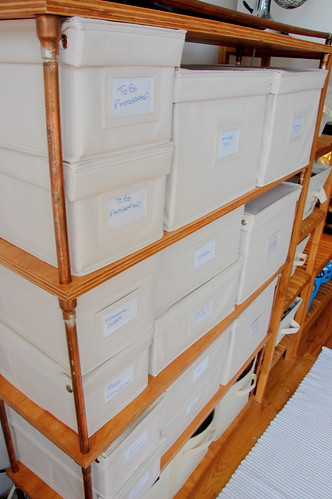
Inspired by all the pipe shelves out there on the internet these days, I wanted to do something similar, but mix it up a bit. Copper pipes seemed like a good way to do that, so here are my custom-made pipe shelves. The soldering is definitely not a beginner type project, but boyfriend did most of the heavy lifting on this project. I also bought a verdigris kit, hoping to turn them a beautiful blue-green color, but my test swipe didn't turn out as well as I had hoped. You can barely barely see a bit of green on the upper left upright piece, which was what happened when I bathed that entire piece in the solution. I might eventually try to actually get it to work, but it's not high on the priority list. I've also upgraded my storage system, as previously my supplies were in a mish-mash of random boxes, with the majority being Staples paper boxes. After looking at pretty much every container ever made and not finding ones which were the right dimensions, I settled on these from Crate and Barrel and they work wonderfully.
Well, we've come to the end of the tour, thanks for stopping by and taking a peek into my home!
Welcome to my Home - The Bathroom
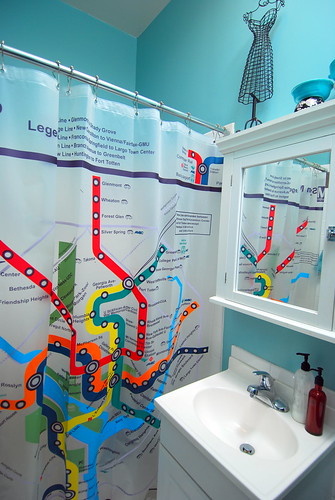
This post is short and sweet, because my bathroom is so incredibly tiny. I tried to inject a little character into it, but not sure it's exactly the way I want it. The one thing I didn't need when I moved into this apartment was a new shower curtain, but I couldn't resist the Metro map curtain when I saw it at BB&B. Needless to say, this threw a wrench in my decorating plans, and I'm still figuring out the details. I had a hard time deciding what color to paint the bathroom, as picking up any of the map colors would make it a bright bathroom indeed. I finally went with a classic turquoise color, which complements the map, I like to think, anyway.

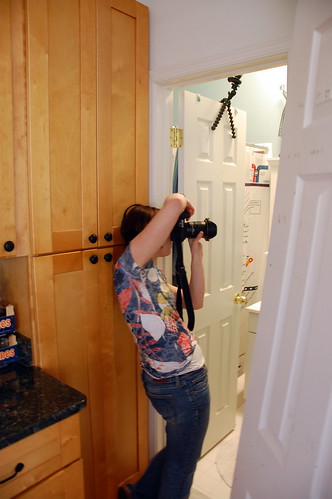
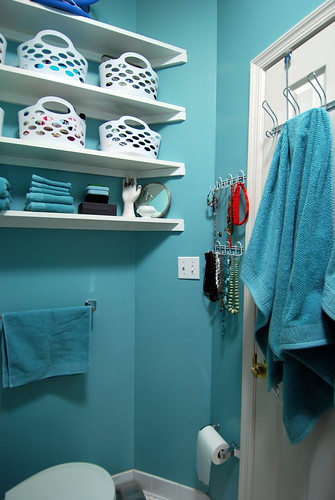
Because there was very little storage in the bathroom, I came up with the idea of shelving on the wall (very original, I know). I found the wide boards for free on Craigslist, painted them white, and bought the white plastic baskets for $1 apiece. It's amazing what a little repetition can do to upgrade a space. I made the map basket on the toilet out of my map stash - more details here. The room is so small that this photo actually is a compilation of two photos.
Trying to fit it all in.
The shower curtain in all its glory. There isn't room for a tub in my bathroom, but I do have a nice-sized shower. It's about 3' x 4'.
I've used these white hook racks for storing my necklaces for at least 4 or 5 years now. I've seen many more stylish solutions, but this is simple and works for me. I keep my rings on my ceramic hand, and my earrings are stored in the little boxes on the shelf. Another staple in every apartment of mine are the over-the-door hooks. There is literally no space for any towel hooks in the bathroom except for the door.
Up next, the final installment - the bedroom!
Friday, April 8, 2011
Welcome to my Home - The Kitchen
My kitchen was a big part of why I liked my new apartment - it was completely new and, wonder of all wonders, included a dishwasher. I love to eat, but I tend to not cook as much as I should, but Boyfriend is a wonderful cook, so he utilizes my kitchen more than I do. :)
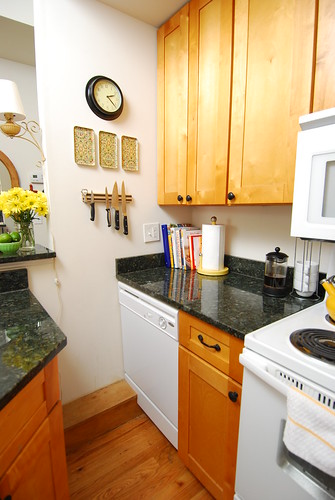
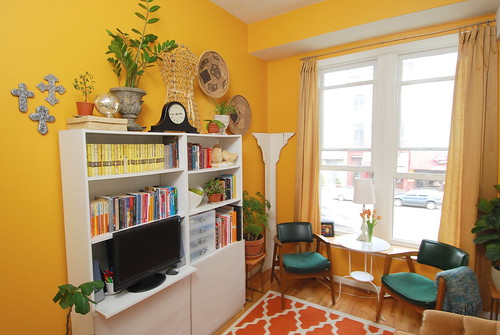
This is the one area in the house where there is actually decent storage space. Most of the upper shelves which I can't reach hold non-kitchen related things, like my sports equipment and old tax returns. Because all but about 6 square feet of wall space in the kitchen are covered in cabinets, there aren't a lot of decorating opportunities, but I did try and pull in the yellow, with the rug, tea kettle, and paper towel holder.
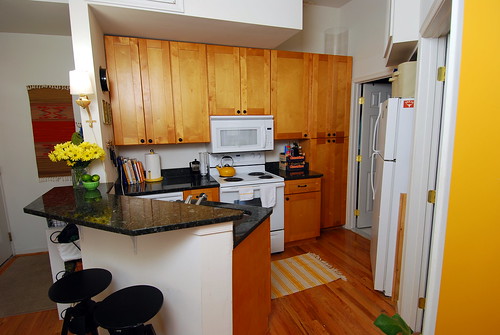
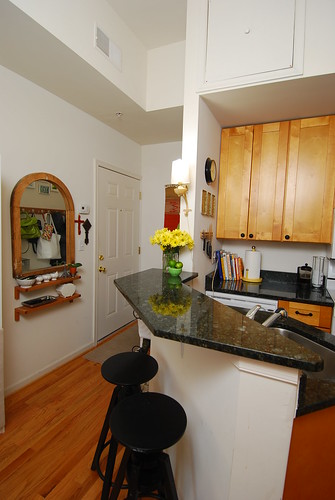
I hate the overhead light in the kitchen, which is the only light in the main room. I rarely use it, so I added this sconce light my mom gave me for a little character.
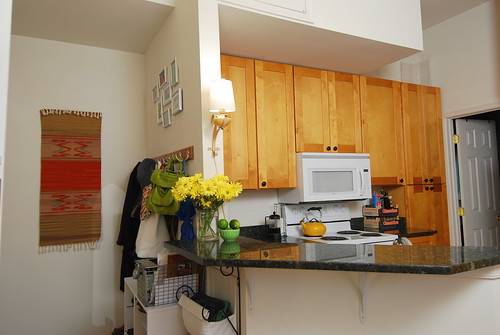
I recently replaced the stools at my counter, as the former stools were much larger, and took up too much of the entryway. I found the plaque above the bedroom door at a thrift store a few months ago, and bought it because I used to have this poster hanging in my dorm room at college and I loved it.

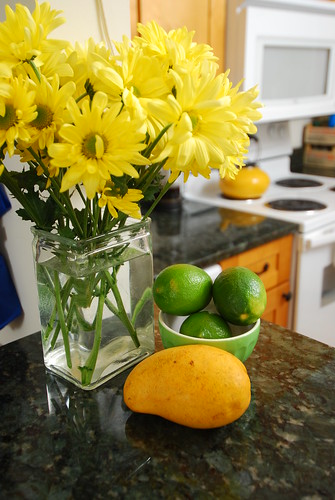
Obligatory vignette
And here is the only actual wall space in the kitchen, which I used to hang some trays I've had for a long time sitting in a box, a clock (I love clocks - I have way too many of them), and my knife strip.
And there you have it - next up, the bathroom!
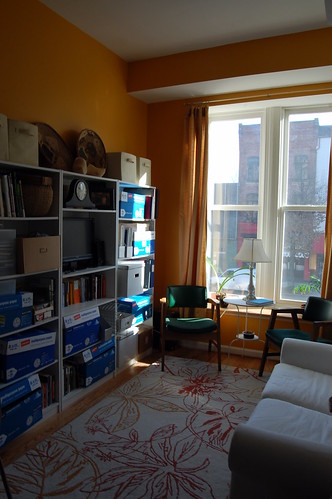
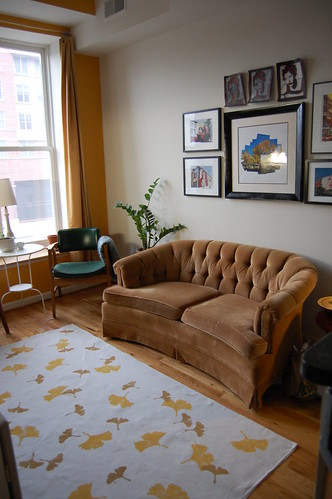
Welcome to my Home - The Living Room
Walking past the entryway puts you smack dab in my living room. This room has experienced the most frequent changes over the past year and few months, but I think it's just about there.
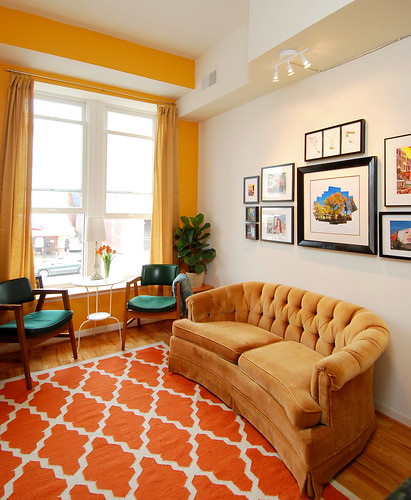
The chesterfield loveseat which was an impulse purchase at Goodwill for $35 about 3 years ago. It completely changed my color scheme at the time, but I love it. I do have enough space for a full-sized couch now though, so I've been daydreaming for a while. The rug was a last minute addition that was sitting in Boyfriend's closet, as I accidentally washed my rug and it isn't doing so hot at the moment. I had originally found it for his bedroom in his old house, and talked about stealing it back then, so it finally made it's way to me. The gallery lighting Boyfriend rigged up for about $15 total from a light fixture from Ikea and some supplies from the hardware store (it was originally hard-wired).
The living room is incredibly narrow, and I've tried about every furniture arrangement I can think of, but this is the only way I can get it to work. I do get a good workout every time I try and change it up though. :)
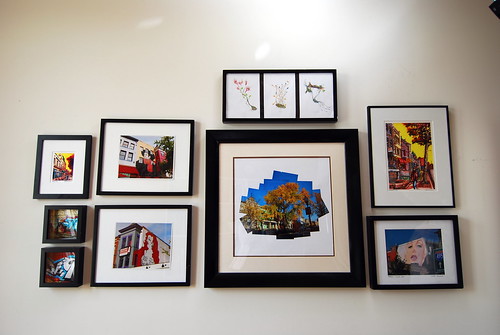
My gallery wall is pretty much complete now. The largest photo is actually a collage of a gingko tree from boyfriend's old street that he made for me, the three mural photos I took in my old neighborhood (Adams Morgan), the two prints with the yellow sky are from my favorite DC artist, Joseph Harrison Snyder, and are also from my old neighborhood, the two graffiti photos I took in Philly, and the top frame holds three pages from an Anthropologie catalog that I saved about 7 years ago or so.
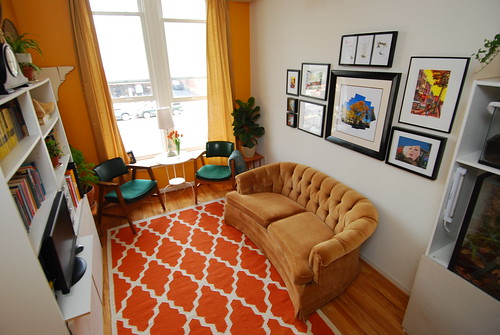
Boyfriend always makes fun of me for having out the wood pieces which are in the corner. They are actually the side rails from my old bed, but I think they look neat. The chairs were a nice $5 apiece I snagged when Boyfriend's office moved. I tried to buy so much more from his office, but Boyfriend wisely held me back. I still regret not buying the like 9' long credenza for $10 though.
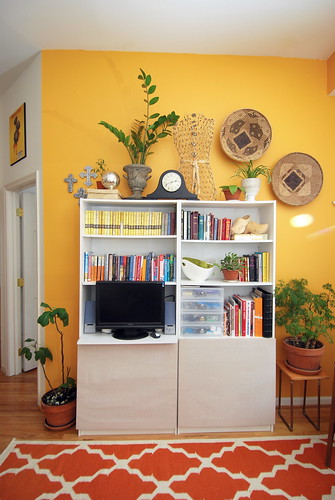
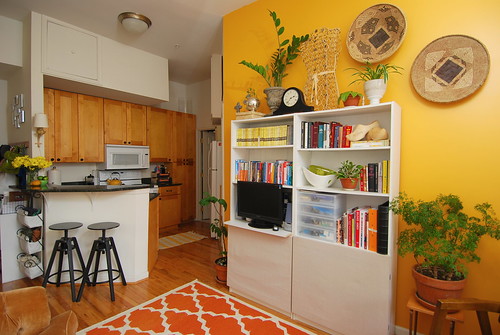
When I first moved in I had grand plans to build custom shelves (actually, I still have all the drawings somewhere), but then I happened up three boring white bookshelves on Craigslist for $25 total. Seeing as how I had a lot of stuff and nowhere to put it, I bought them as a temporary solution. They have grown on me, and knowing how long it takes for me to compete projects, I'll just stick with these. I did customize them though, by making canvas doors for the bottoms. Stay tuned for a post on that. The plant stand/end table (of which I have two) is also DIYed. I bought ten ten foot long copper pipes on Craigslist, so I cut it all to size, and boyfriend soldered it together to make these. Stay tuned for more copper in the bedroom. I also have plans to make a copper floor lamp but that hasn't happened yet.
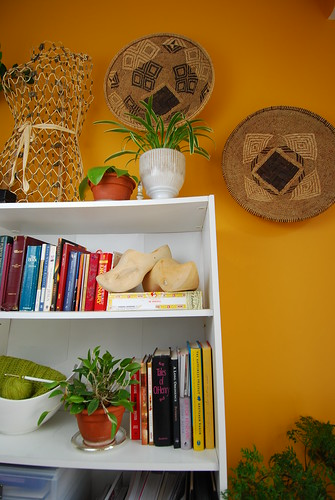
A close-up of some of my treasures. The baskets I brought back from Zambia, Lucy is my dress-maker's form, and I got her at a garage sale in high school for $2, and my wooden clogs came from the Singel Canal Flower Market in Amsterdam (one of my favorite places ever).
Get ready to move to the kitchen!
Thursday, April 7, 2011
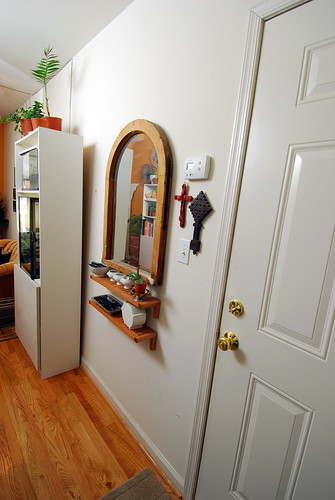
Welcome to my Home - The Entrance
So I thought that since I took a bunch more photos than the five required for the Small Cool contest, I would share them with you all! Since there are a lot of them, I'm going to break it up and make you wait a bit to see the whole thing.
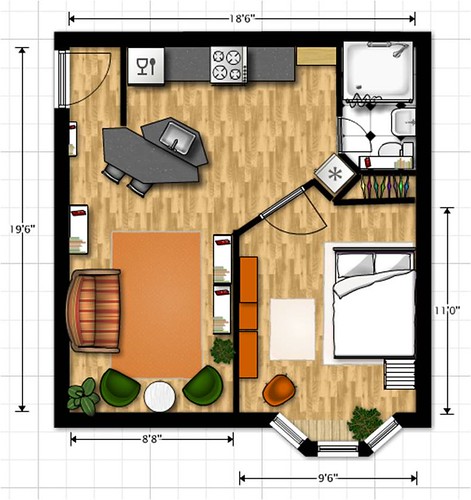
The floorplan
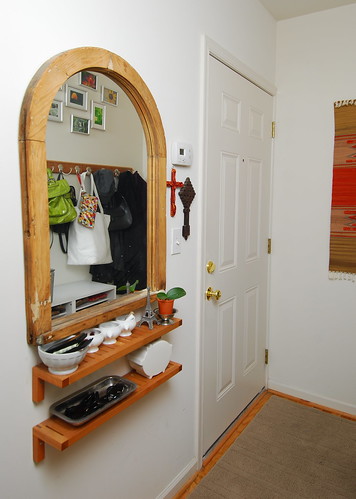
Come on in! My entryway has a bowl for everything - boyfriend's bowl for stuff he would otherwise leave laying all over the place, sunglasses, keys, quarters for laundry, chapstick, and other change.
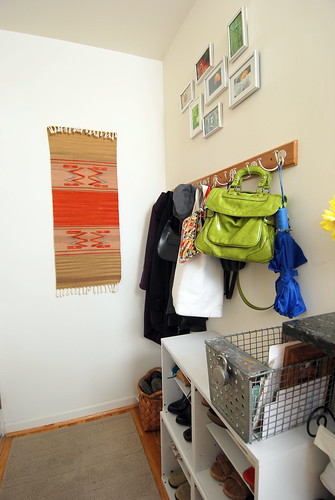
On the other side is plenty of room for shoes, jackets, and purses. Boyfriend also has a basket for larger items that need to make their way back to his house. My table runner from Botswana works perfectly to cover up my fuse box.
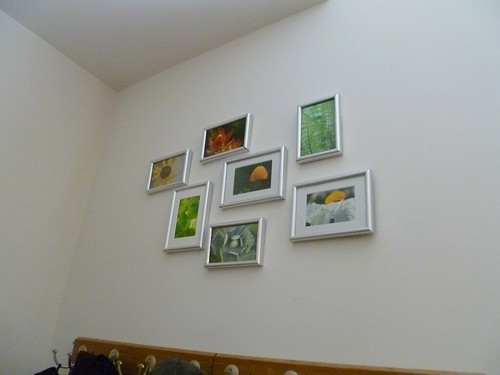
A close-up of my mini-gallery wall of botanical photos I've taken.
And now we head to the living room. I recently switched one of my bookshelves over to this wall to hold two of my terrariums. I eventually will build a custom shelving unit for them, but for the time being, this works.
Subscribe to:
Posts (Atom)